
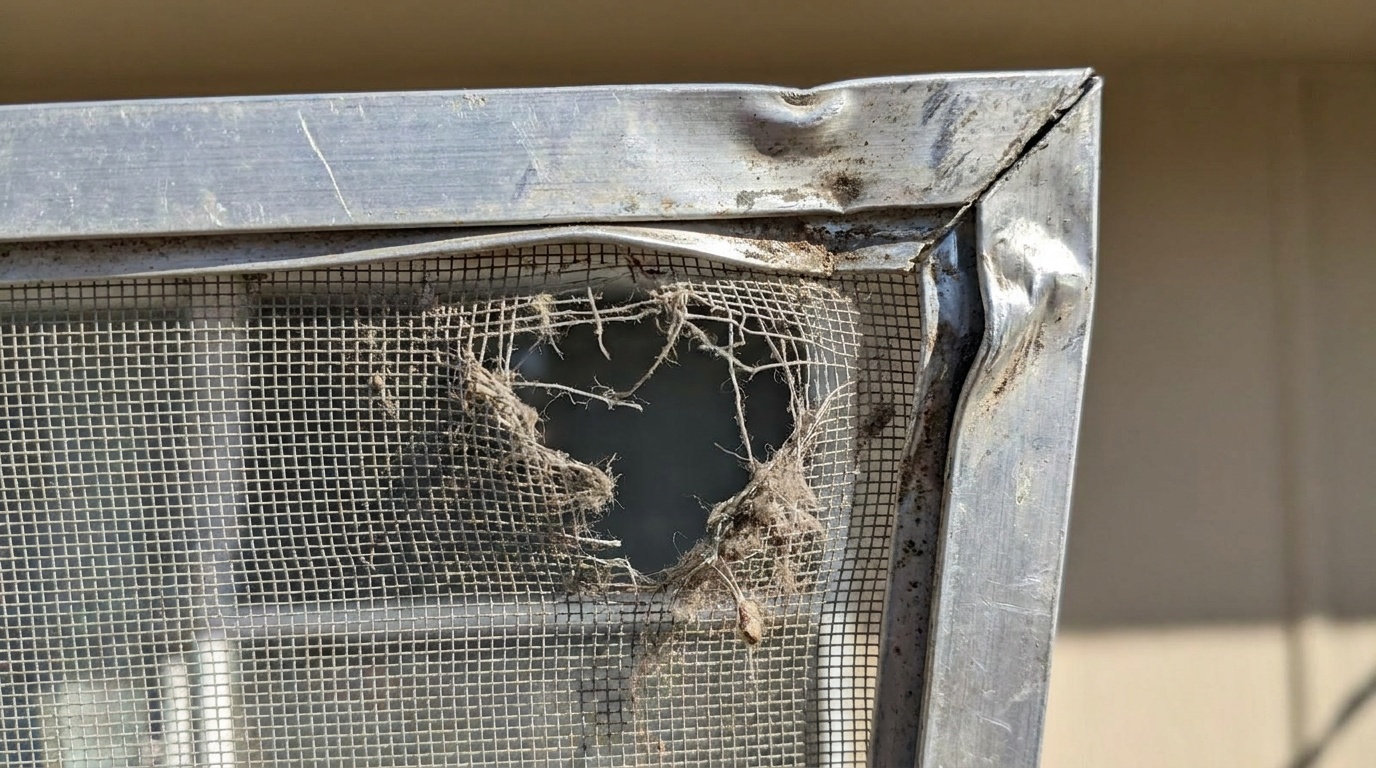
Window Screen Repair and Replacement Basics for Homeowners
Reading time: 14 minutes
That first warm Saturday of spring hits, and you finally crack open the windows — only to discover a gaping hole in your screen, bent frame corners, or mesh that’s sagging like an old hammock. Sound familiar? You’re definitely not alone. Window screens are one of those household components we completely ignore until they fail us at the worst possible moment — usually right when the mosquitoes are out in force.
Here’s the good news: window screen repair and replacement is one of the most accessible DIY home maintenance tasks you can tackle. With the right knowledge, a few inexpensive tools, and about an hour of your weekend, you can go from bug-invaded bedroom to breezy, protected comfort. This guide cuts through the confusion and gives you a practical, step-by-step framework — whether you’re patching a small tear or rebuilding a frame from scratch.
Table of Contents
- Why Window Screens Matter More Than You Think
- Diagnosing Your Screen Problem
- Tools and Materials You Actually Need
- Repair vs. Replace: Making the Smart Call
- Step-by-Step Screen Repair Guide
- Full Screen Replacement Walkthrough
- Choosing the Right Screen Material in 2026
- Cost Breakdown and Savings Analysis
- Common Challenges and How to Overcome Them
- Frequently Asked Questions
- Your Window to a Better Home: Next Steps
Why Window Screens Matter More Than You Think
Window screens are quietly doing heavy lifting in your home’s comfort ecosystem. Beyond keeping insects out, quality screens provide UV filtration, improved airflow management, and even a modest degree of privacy. According to the National Pest Management Association’s 2025 Household Report, mosquito-borne illness cases in the continental United States rose by 18% in 2025 compared to 2023 levels, largely attributed to expanding warm-climate zones and longer warm seasons. A properly maintained window screen is genuinely a health tool, not just a comfort feature.
In 2026, with energy costs still elevated in many regions, homeowners are leaning heavily into natural ventilation to reduce HVAC load during shoulder seasons. That makes a functional, well-fitting window screen not just pleasant but economically valuable. The U.S. Department of Energy estimates that strategic natural ventilation can reduce cooling costs by 10–15% in mild climates — but only when screens are in good condition and allow proper airflow without gaps that let in hot air or pests.
“A damaged window screen isn’t just an annoyance — it’s a gap in your home’s environmental envelope that affects energy efficiency, indoor air quality, and pest control simultaneously.”
— Dr. Mariana Holt, Building Science Specialist, Home Innovation Research Labs, 2025
Diagnosing Your Screen Problem
Before you run to the hardware store, spend five minutes properly diagnosing what you’re dealing with. Grabbing the wrong solution wastes both time and money. Walk through your windows systematically and assess each screen for these specific issues:
Common Screen Damage Categories
- Small holes or tears (under 1 inch): Typically caused by pets, sharp objects, or normal wear. These are ideal candidates for patch repair — a 10-minute fix.
- Large tears or multiple damage points: When a screen has more than 2–3 holes, or one tear exceeds 2–3 inches, full mesh replacement is more cost-effective than patching.
- Bent or warped frame: Aluminum frames can be gently straightened; fiberglass frames often need full replacement once bent significantly.
- Deteriorated spline: The rubber spline cord holding the mesh in the frame groove dries out and cracks over time — this is extremely common in screens older than 5–7 years.
- Screen separation from frame: When mesh pulls away from the frame groove, it usually means the spline has failed rather than the mesh itself.
- Corrosion or frame damage: In coastal areas or high-humidity zones, aluminum frames can corrode significantly, requiring full frame replacement.
The Quick Diagnostic Test
Run your fingertip lightly along the spline groove around the entire perimeter. If the spline feels brittle, crumbles slightly, or has visible gaps, that’s your primary culprit for screen sag or separation — even if the mesh itself looks intact. Next, hold the screen up against natural light and look for any pinholes that aren’t visible at normal viewing angles. Small holes that look minor can allow dozens of insects through per hour on warm evenings.
Pro Tip: Photograph every screen with an issue before removal. Note which window it came from — screens are often slightly different sizes even within the same house, and mixing them up is a surprisingly common (and frustrating) mistake.
Tools and Materials You Actually Need
One of the biggest friction points for DIY screen work is showing up underprepared. Here’s the honest, no-fluff list of what you need for most repair and replacement jobs:
For Patch Repairs
- Self-adhesive fiberglass screen patch kit (widely available for $4–$8 in 2026)
- Scissors or utility knife
- Clean cloth and rubbing alcohol (for surface prep)
For Full Mesh or Frame Replacement
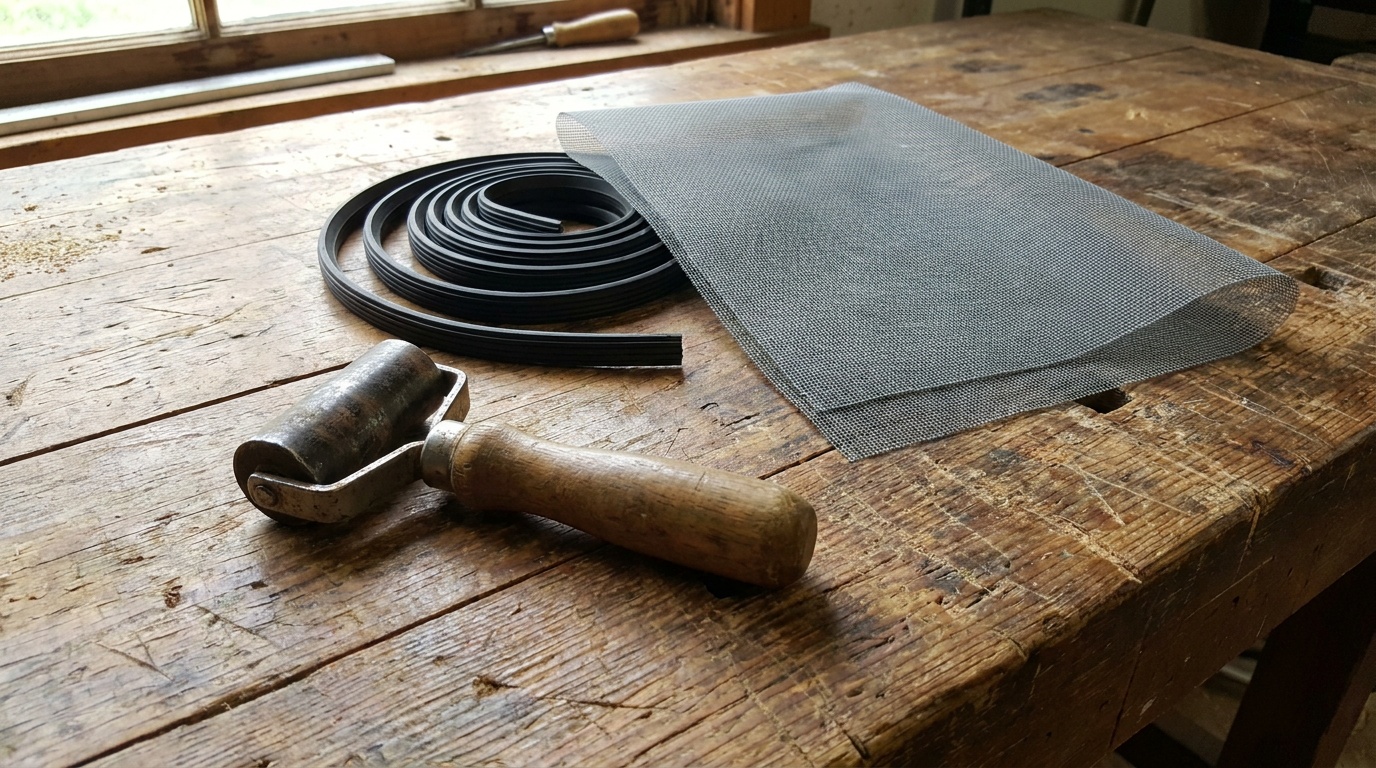
- Screen rolling tool (also called a spline roller — typically $6–$12; the double-wheeled type is worth the extra few dollars)
- Replacement spline cord — measure your existing spline diameter before buying; 0.140″ and 0.160″ are the most common sizes
- Replacement screen mesh — buy a roll slightly larger than your frame dimensions
- Utility knife with fresh blades
- Flat-head screwdriver or spline removal tool
- Tape measure
- Flat work surface (a table works fine)
- Clamps or heavy books (to hold frame flat while working)
Total investment for a full replacement setup, if you’re buying from scratch: roughly $20–$40 in 2026, depending on mesh type chosen. That setup will handle multiple windows before needing any restocking.
Repair vs. Replace: Making the Smart Call
This is where most homeowners hesitate — and understandably so. The wrong choice costs you either unnecessary money (replacing something patchable) or wasted effort (patching something that’ll fail again in two months). Here’s a clear decision framework:
| Scenario | Recommended Action | Estimated Cost (2026) | Difficulty | Time Required |
|---|---|---|---|---|
| Single hole under 1 inch | Patch repair | $4–$8 | Beginner | 10–15 min |
| Multiple holes or tears over 2″ | Full mesh replacement | $15–$30 | Beginner–Intermediate | 30–45 min |
| Failed spline, mesh intact | Spline replacement | $5–$12 | Beginner | 20–30 min |
| Bent or damaged frame | Full frame + mesh replacement | $20–$50 | Intermediate | 45–90 min |
| Corroded frame in coastal area | Professional replacement recommended | $60–$150/window | Professional | Varies |
A practical example: Sarah, a homeowner in Austin, Texas, faced three damaged screens in spring 2025. Two had cat-related punctures under an inch, and one had a frame that had been bent during a storm. She patched the small holes herself in 20 minutes total, bought a pre-made replacement frame for $28 from a local hardware store for the damaged one, and saved roughly $180 compared to a professional service quote. That’s the sweet spot this guide is aiming to help you hit.
Step-by-Step Screen Repair Guide
Method 1: Adhesive Patch Repair (Holes Under 1.5 Inches)
- Remove the screen from the window by locating the pull tabs at the corners and gently lifting upward and outward. Most modern screens slide out without tools.
- Lay the screen flat on a clean, hard surface. Clean the area around the hole with a slightly damp cloth, then let it dry completely.
- Cut your patch to be at least 1 inch larger than the hole on all sides. Round the corners slightly — this prevents edge peeling over time.
- Peel and apply the adhesive patch carefully, centering it over the hole. Press firmly outward from the center to avoid air bubbles.
- Let it cure for at least 2 hours before reinstalling. Self-adhesive fiberglass patches bond well to both fiberglass and aluminum mesh.
Method 2: Weave Repair for Fiberglass Mesh (Tears up to 3 Inches)
This method takes more patience but is nearly invisible when done well. Using a straight pin or toothpick, gently separate the mesh strands near the tear rather than cutting them away. Weave a small piece of matching mesh (cut from a scrap or patch kit) into the existing strands using a needle. The interlocking fiberglass holds surprisingly well and won’t peel the way adhesive patches occasionally can in high-humidity environments.
Full Screen Replacement Walkthrough
This is the core skill every homeowner should have. It sounds intimidating but follows a logical sequence once you understand the anatomy of the screen.
- Remove and measure the frame. Take the screen down and measure the inner dimensions of the frame — length and width of the open area. Add 1 inch to each measurement when cutting your new mesh.
- Remove the old spline. Use a flat-head screwdriver or spline tool to pry up one corner of the existing spline and pull it out. Discard both the old spline and old mesh.
- Lay new mesh over the frame. Position it so the excess extends evenly beyond the frame edges on all sides. The mesh should lie flat and smooth — take a moment to straighten it before proceeding.
- Roll in the spline — one side at a time. Starting with a long side, use the convex (rounded) wheel of your spline roller to press the new spline into the groove over the mesh. Apply firm, consistent pressure. Work in one continuous motion rather than short bursts to avoid crimping.
- Move to the opposite long side, pulling the mesh taut (but not overly tight — you want it taut like a drum, not stretched to distortion) before rolling in the spline.
- Complete the two short sides in the same manner. At corners, use the flat end of a screwdriver to press the spline snugly into the corner groove.
- Trim the excess mesh using a sharp utility knife. Hold the blade flat against the outer edge of the spline groove and slice carefully — avoid cutting into the spline itself.
- Inspect and reinstall. Hold the finished screen up to light and check for any sagging or gaps in the spline. Reinstall in the window and test the fit.
Common mistake to avoid: Many beginners roll the spline too tight on the first side, causing the mesh to pucker on the opposite corner when they complete the frame. The fix is to work gradually and check tension after each side before committing to the next.
Choosing the Right Screen Material in 2026
Screen mesh technology has advanced meaningfully in recent years. In 2026, homeowners aren’t just choosing between “regular” and “pet-proof.” Here’s what the current market actually offers:
- Standard Fiberglass (18×16 mesh): The classic choice. Flexible, rust-proof, easy to work with, and very affordable. Ideal for most residential applications. Approximately $0.30–$0.50 per square foot.
- Aluminum mesh: More rigid and durable than fiberglass, but can crease if bent during installation. Better for high-traffic areas. Around $0.50–$0.80 per square foot.
- Pet-resistant screen: Made from heavy-duty vinyl-coated polyester, roughly 7x stronger than standard fiberglass. If you have cats or dogs, this pays for itself quickly. About $1.20–$2.00 per square foot.
- Solar/privacy screen (phifer or similar): Blocks 80–90% of UV rays and provides daytime privacy while maintaining outward visibility. Increasingly popular with the work-from-home demographic. $2–$4 per square foot.
- Pollen/fine-particle mesh: Higher thread count (20×20 or finer) that blocks pollen and fine dust particles — a growing category in 2026 given rising outdoor air quality concerns. $1.50–$3.00 per square foot.
2026 Screen Material Popularity Among DIY Homeowners
Source: HomeAdvisor DIY Survey, Q1 2026 (estimated composite data)
Cost Breakdown and Savings Analysis
Let’s talk real numbers. In 2026, professional screen repair services in major U.S. markets typically charge:
- Basic repair (patch or spline): $45–$75 per screen including labor
- Full mesh replacement: $65–$120 per screen
- Full frame + mesh replacement: $90–$180 per screen
- Minimum service call fee: $60–$100 (even if the job takes 10 minutes)
Consider a homeowner with a typical suburban house — say, eight windows with screen issues. Professional service for five mesh replacements and three patch repairs could run $500–$750 with a service call. Doing it yourself? Approximately $65–$90 in materials, with tools that are reusable for years. That’s a savings of $400–$680 in a single afternoon.
A note on when NOT to DIY: If your windows are above the second floor and require ladder work on uneven terrain, or if frames are corroded and require precise cutting of new aluminum extrusions, professional involvement is genuinely worth the cost from a safety and quality standpoint.
Common Challenges and How to Overcome Them
Challenge 1: Mesh Keeps Sagging After Installation
This is the most common frustration for first-timers. The mesh looks taut coming off the roll but sags once installed. The culprit is almost always uneven spline tension — one side was rolled too tight, pulling more mesh than needed, which left slack elsewhere. The fix: Remove the spline from the sagging side only, gently pull the mesh taut by hand while an assistant holds the frame flat, and re-roll the spline. Alternatively, a heat gun on low setting (or even a hair dryer) held 6–8 inches from fiberglass mesh for 30 seconds can slightly tighten it by causing minor thermal contraction — a lesser-known but effective trick.
Challenge 2: Spline Won’t Stay in the Groove
This typically means you’ve purchased the wrong spline diameter, or the groove has been damaged. First, measure your groove width carefully — use a set of calipers if possible. If the groove is damaged or worn from previous spline changes, try going one size up on spline diameter (e.g., from 0.140″ to 0.160″). You can also apply a tiny bead of clear silicone caulk in the groove before rolling in the spline to help it grip — allow full cure time before reinstalling the screen.
Challenge 3: Finding Non-Standard Frame Sizes
Older homes and custom windows often have screens that don’t match any pre-made size. In 2026, this is less of an obstacle than it used to be — many hardware stores and online retailers offer custom screen frame kits where you purchase aluminum extrusion, corner keys, spline, and mesh separately and cut to your exact measurements. Brands like Phifer, New York Wire, and Prime-Line all offer robust DIY custom kits available through major retailers. Measure twice, cut once — and invest in a good miter box or hacksaw with a fine-tooth blade for clean aluminum cuts.
Frequently Asked Questions
How often should window screens be replaced, even without visible damage?
Even screens that look intact typically degrade meaningfully after 7–10 years. UV exposure breaks down fiberglass mesh at the molecular level, making it brittle and prone to sudden failure. Spline rubber also dries out on a similar timeline. A good rule of thumb: if your screens are older than 8 years, inspect the spline by pressing gently — if it cracks or crumbles, it’s time for proactive replacement regardless of how the mesh looks. In regions with intense sun exposure (Arizona, Florida, Southern California), that replacement cycle shortens to 5–7 years.
Can I repair a torn screen while it’s still in the window frame?
For simple adhesive patch repairs on small holes, yes — you don’t necessarily need to remove the screen. Clean the area thoroughly, apply the patch, and press firmly. However, for any spline work or full mesh replacement, always remove the screen first. Working with a screen in the window makes it nearly impossible to maintain even tension across the mesh during spline rolling, and you risk scratching your window frame or trim with tools. The 2-minute effort to pop out the screen saves significant frustration.
What’s the best way to clean window screens without damaging them?
Lay the screen horizontally on a flat surface outdoors. Mix a small amount of dish soap in warm water and use a soft brush (a dedicated soft-bristle scrub brush or even a clean paintbrush works well) to gently scrub both sides in circular motions. Rinse with a gentle hose stream — never a pressure washer, which can distort fiberglass mesh and dislodge spline. Allow to air dry completely before reinstalling. For aluminum mesh, avoid acidic cleaners, which can cause oxidation. A gentle annual cleaning extends screen lifespan significantly and maintains optimal airflow.
Your Window to a Better Home: Next Steps
Window screen maintenance sits at the intersection of home comfort, health, and energy efficiency — and in 2026, all three of those categories matter more than ever to homeowners navigating rising utility costs and shifting climate patterns. The skills you develop repairing one screen transfer directly to every other screen in your home, and to your neighbors’ homes if you’re the helpful type.
Here’s your practical action checklist to move from reading to doing:
- This weekend: Walk every window in your home and photograph any screen with visible damage, sagging, or spline issues. Rank them by severity.
- Before your next hardware store trip: Measure three things for each damaged screen — frame outer dimensions, spline groove diameter, and existing mesh type. Bring your notes and a photo.
- Start with your easiest repair first. Nothing builds DIY confidence like a successful patch on a small hole before taking on a full mesh replacement.
- Invest in a quality spline roller. The $12 double-wheeled version versus the $4 basic version makes a meaningful difference in your results — it’s the one tool upgrade worth making immediately.
- Schedule a full screen audit annually, ideally in early spring before you need them. Proactive replacement is far less stressful than emergency repairs in peak bug season.
As climate patterns continue shifting and indoor-outdoor living remains a priority for homeowners in 2026 and beyond, well-maintained window screens are going to be an increasingly valued element of the home environment — contributing not just to pest control but to air quality management, UV protection, and passive cooling strategy.
So here’s a question worth sitting with: How many afternoons of genuine open-window comfort are you leaving on the table because of damaged screens you haven’t gotten around to fixing yet? The tools are affordable, the skills are learnable, and the payoff — sleeping with a breeze and no bugs — is immediate. Your windows are waiting.
Article reviewed by Hans Müller, Industrial Architecture & Concrete Restoration Specialist, on May 4, 2026