
Heating Oil Tank Inspection and Care: Preventing Costly Leaks
Reading time: 14 minutes
Imagine waking up on a January morning to discover your home has no heat — and your basement smells unmistakably of fuel oil. You check your tank and find a slow, steady drip pooling on the concrete floor. What started as a minor inspection oversight has just turned into a potential $10,000 environmental cleanup bill, a frantic call to your oil supplier, and a cold family. Sound familiar? For thousands of homeowners across the northeastern United States, Canada, and the UK, this scenario plays out every single heating season.
Here’s the straight talk: most heating oil tank failures don’t happen overnight. They build quietly — through rust, sediment, neglected fittings, and ignored warning signs — until the damage becomes impossible to ignore. The good news? With the right inspection routine and care strategy, you can prevent the vast majority of expensive leaks before they start.
Whether you’re a first-time homeowner with an inherited tank or a seasoned property manager overseeing multiple systems, this guide cuts through the noise and gives you a precise, actionable roadmap for protecting your investment and your environment.
Table of Contents
- Why Regular Inspections Are Non-Negotiable in 2026
- Understanding Your Tank: Types, Materials, and Lifespans
- Common Failure Points Every Homeowner Should Know
- The DIY Inspection Checklist: Step-by-Step
- When to Call a Professional: Signs You Shouldn’t Ignore
- Preventive Care Strategies That Actually Work
- Cost Comparison: Maintenance vs. Remediation
- 2026 Regulatory Landscape: What Homeowners Must Know
- Frequently Asked Questions
- Your Tank Protection Roadmap: Next Steps
Why Regular Inspections Are Non-Negotiable in 2026
Heating oil tank failures remain one of the most underreported — and financially devastating — home maintenance crises in cold-climate regions. According to data from the U.S. Environmental Protection Agency compiled through 2025, residential oil tank leaks account for over 40% of all reported home heating fuel spills, with the average remediation cost for a contaminated site now exceeding $12,500 in 2026, up from approximately $9,800 just four years ago. That figure can balloon to $50,000 or more if contamination reaches groundwater or a neighboring property.
The aging housing stock in the Northeast U.S. and Atlantic Canada is particularly vulnerable. Many homes still operate on tanks installed in the 1970s and 1980s — steel vessels now well past their typical 20-to-30-year functional lifespan. In the UK, the Oil Firing Technical Association (OFTEC) estimates that there are still over 1.5 million domestic oil heating systems in operation, with a significant percentage relying on tanks that have never had a formal structural inspection.
2026 has also introduced tighter environmental compliance requirements in several U.S. states, including New York, Massachusetts, and Connecticut, meaning that what was once a voluntary best practice has increasingly become a legal obligation for homeowners. Staying ahead of inspections isn’t just smart — it’s becoming mandatory.
“The majority of tank failures we respond to could have been prevented with a $200 annual inspection. Instead, homeowners are facing bills in the tens of thousands. Prevention is always the cheaper option — by a massive margin.” — Mike Terrano, Senior Environmental Remediation Specialist, Northeast Tank Services (2025 Industry Report)
Understanding Your Tank: Types, Materials, and Lifespans
Before you can properly inspect or care for your heating oil tank, you need to know exactly what you’re dealing with. Not all tanks are created equal, and their failure modes differ significantly based on material, age, and installation environment.
Aboveground Storage Tanks (ASTs)
The most common residential setup, aboveground tanks are typically located in basements, utility rooms, or outside the home. They come in several materials:
- Single-wall steel: The most prevalent tank type in homes built before 1990. Susceptible to both internal corrosion (from water and sludge at the bottom of the tank) and external rust. Expected lifespan: 20–30 years under ideal conditions.
- Double-wall steel: Features an outer shell that acts as a containment barrier if the inner tank leaks. Dramatically reduces environmental risk. Increasingly mandated for new installations in many jurisdictions. Lifespan: 25–35 years.
- Fiberglass or polyethylene: Resistant to corrosion, lighter, and increasingly popular in modern installations. These don’t rust but can become brittle over time in extreme cold. Lifespan: 30–40 years with proper care.
Underground Storage Tanks (USTs)
Less common in residential settings today but still present in older properties, underground tanks pose the highest risk because leaks are often invisible until significant soil or groundwater contamination has already occurred. Many municipalities have pushed hard for the removal or abandonment-in-place of residential USTs over the past decade. If your property has an underground tank, professional inspection is not optional — it is essential.
Tank Age and the Replacement Decision
Here’s a practical guideline most industry professionals follow in 2026: if you have a single-wall steel aboveground tank that is over 20 years old, it deserves serious evaluation for replacement, regardless of apparent condition. Internal corrosion is often invisible from the outside. If your tank is over 30 years old, the replacement conversation should probably already be behind you.
Common Failure Points Every Homeowner Should Know
Understanding where and how tanks fail puts you in control of the inspection process. The following are the most frequently encountered failure points, ranked by how often they cause significant leaks.
Internal Corrosion and Sludge Buildup
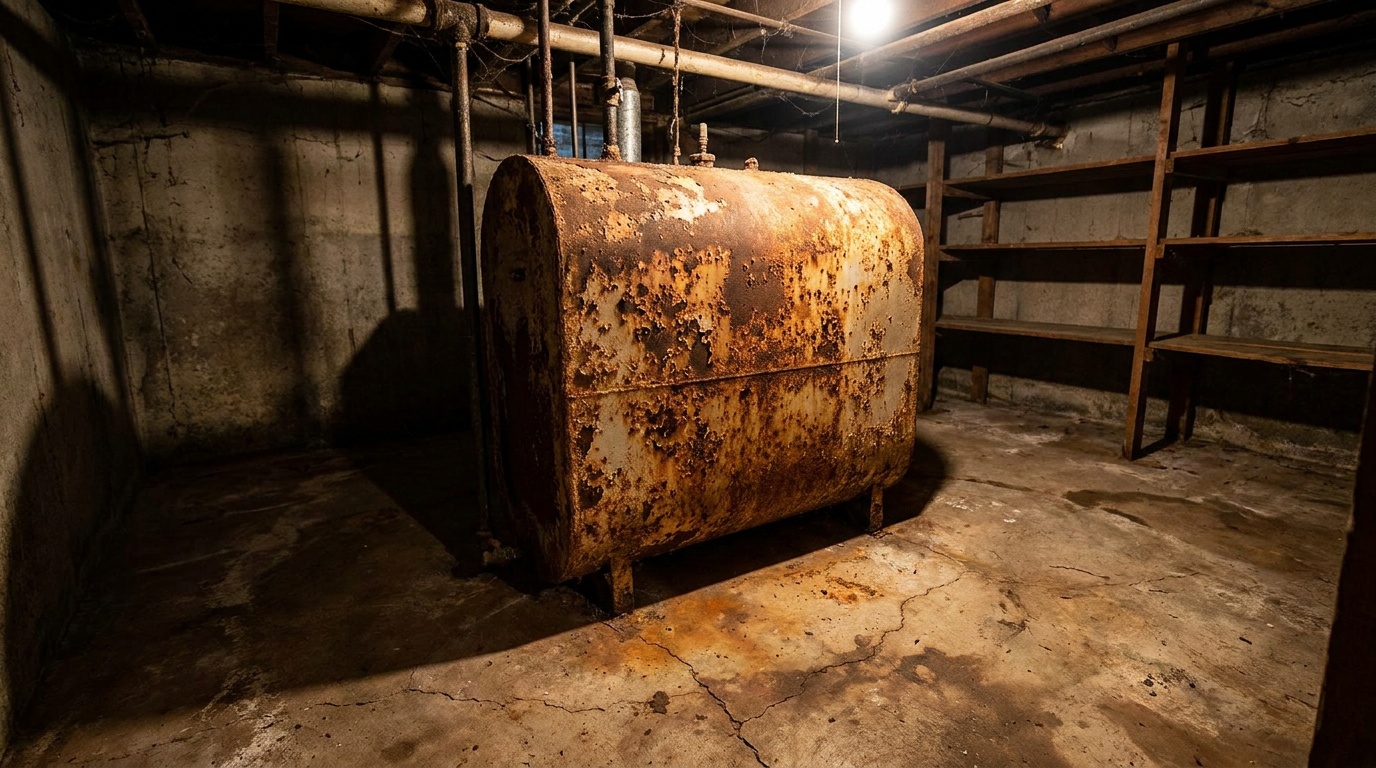
This is the silent killer of steel tanks. Heating oil naturally contains small amounts of water — introduced through condensation, delivery contamination, or loose fill caps. Water sinks to the bottom of the tank, where it creates an ideal environment for microbial activity and rust. Over time, this produces a layer of sludge that accelerates corrosion, can clog fuel lines, and eventually eats through the tank floor.
A compelling case study: A homeowner in Connecticut (reported in the 2025 New England Fuel Institute Annual Review) discovered a pinhole leak in the bottom of her 24-year-old single-wall steel tank only after an oil delivery driver noticed an unusually strong fuel smell in her basement. Tank inspection revealed the floor had corroded to under 1mm thickness in several areas — a condition that had been developing silently for at least five years. The tank had never been internally inspected or treated with a biocide additive. Remediation cost: $14,200.
Fitting and Connection Failures
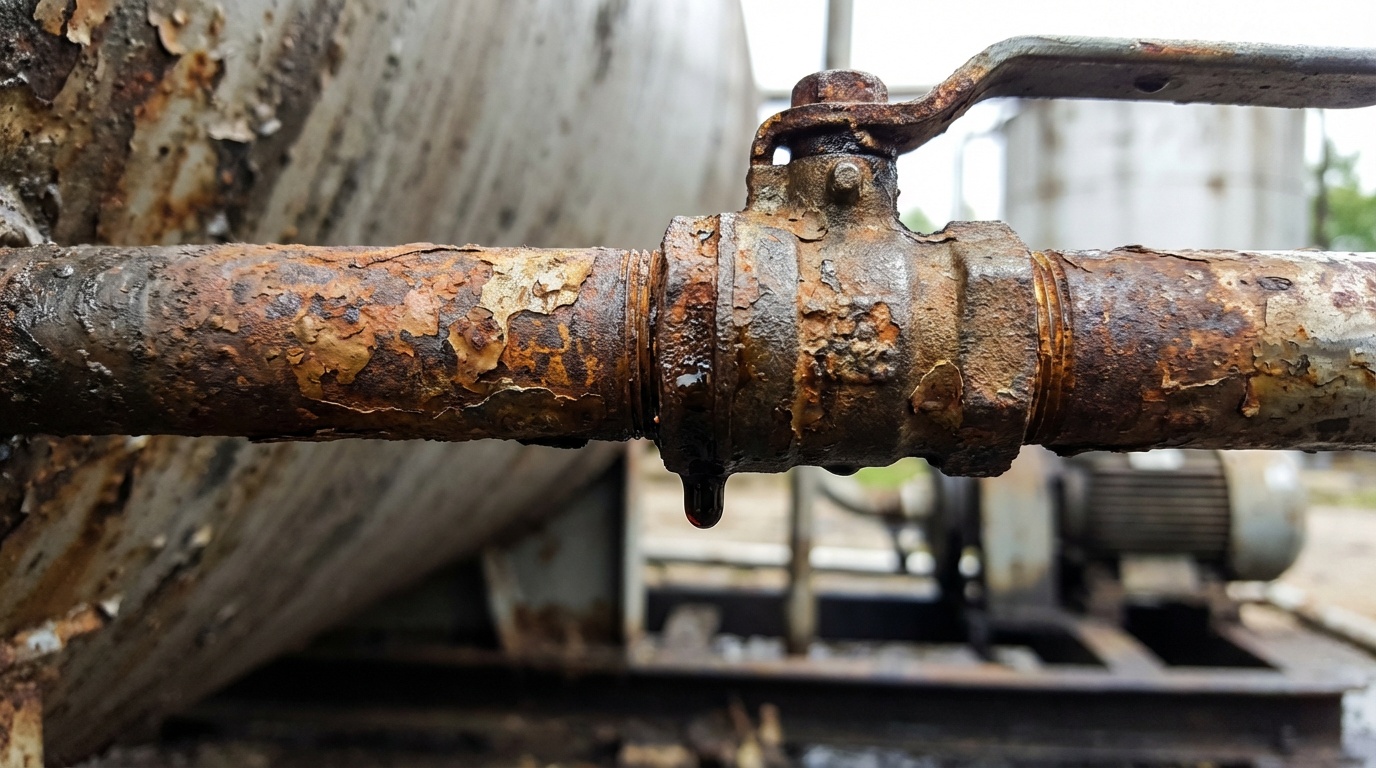
Fittings, valves, and supply lines are often overlooked during casual visual checks. These components, particularly older compression fittings and flexible copper supply lines, are prone to cracking, loosening, and deterioration. A failed supply line fitting can release oil far faster than a pinhole tank leak — and often goes unnoticed if your tank is in a low-traffic area like a utility room.
Vent Pipe Blockages
Every tank has a vent pipe that allows air to enter as oil is consumed. If this pipe becomes blocked — by insect nests, debris, or physical damage — a vacuum can build up that puts stress on tank seams and can actually draw water into the tank. Always check that your vent pipe cap is intact and unobstructed.
Fill Pipe and Cap Issues
An improperly sealed fill pipe is a direct pathway for rainwater and contaminants to enter your tank. Cracked or missing fill caps are among the easiest problems to fix and among the most commonly ignored.
Legs and Support Structure Corrosion
For indoor tanks sitting on legs, rust at the contact points between legs and the tank body is a frequent and underappreciated failure mode. If legs corrode through, the physical stress on the tank shell can cause cracking and leaks independent of any internal issues.
The DIY Inspection Checklist: Step-by-Step
You don’t need to be a tank technician to perform a meaningful basic inspection. Here’s a practical routine you should complete at least twice a year — ideally before the heating season starts (September/October) and once mid-season (January/February).
Before You Begin: Make sure the area is ventilated, wear nitrile gloves, and have a flashlight ready. Never use an open flame or spark-producing tools near the tank.
- Visual exterior scan: Walk around the entire tank looking for rust patches, discoloration, oil stains on the floor, or wet spots on the tank surface. Pay particular attention to seams, the bottom perimeter, and leg contact points.
- Check all fittings and connections: Inspect the supply line, return line (if present), and all valves. Look for any oily residue, which indicates a slow weep or drip. Tighten any visibly loose connections — but don’t overtighten old fittings, as this can crack brittle threads.
- Inspect the fill pipe and cap: Ensure the fill cap is present, properly threaded, and undamaged. Check the fill pipe for cracks or corrosion at the soil entry point (for outdoor installations).
- Check the vent pipe: Verify the vent pipe cap is in place and that the pipe itself isn’t bent, blocked, or disconnected.
- Oil level gauge inspection: If your tank has a sight gauge, check it for cracks or discoloration. A cloudy or oil-stained gauge may indicate internal contamination. Confirm the gauge reads accurately by comparing it to a delivery receipt.
- Check the surrounding floor: Oil stains on concrete can be subtle — look for any discoloration or smell in the area directly beneath fittings and the tank bottom.
- Document everything: Take dated photos of your inspection. This creates a record of your tank’s condition over time and can be invaluable for insurance claims or professional assessments.
Pro Tip: Keep a simple logbook — digital or paper — that records each inspection date, what you observed, any actions taken, and when you last had the tank professionally serviced. This takes less than five minutes and can dramatically speed up professional diagnoses.
When to Call a Professional: Signs You Shouldn’t Ignore
DIY checks are valuable, but they have clear limits. Certain signs demand professional attention immediately — and delaying in these cases is where the real financial and environmental damage compounds.
Call a certified tank inspector if you notice any of the following:
- Any visible oil on the floor beneath your tank — even a single small stain
- A persistent fuel oil smell in your home, particularly in the basement or utility area
- Your heating system is consuming more fuel than in previous comparable periods
- You can hear air gurgling in fuel lines during burner operation
- Any fitting or valve that is wet with oil residue
- A tank that is 20+ years old and has never had a professional inspection
- Visible rust flaking from the exterior, particularly around the tank base or seams
A professional inspection typically includes an ultrasonic thickness test — a non-invasive method that measures the remaining wall thickness of your steel tank from the outside, identifying thin spots that indicate internal corrosion. This technology has become more affordable and accessible; as of 2026, a professional ultrasonic inspection for a standard residential tank typically costs between $150 and $350 depending on your region, a small price compared to remediation.
Preventive Care Strategies That Actually Work
Inspection is only half the equation. Proactive care strategies significantly extend tank life and reduce the probability of failures. Here are the approaches that deliver the most value.
Fuel Additives and Biocide Treatments
Adding a quality biocide treatment to your tank annually kills the microbial organisms responsible for sludge formation and internal corrosion. Products containing isothiazolinone compounds or 2,2′-(1-methyltrimethylenedioxy)bis active ingredients are widely available and recommended by most tank service professionals. A yearly treatment costs approximately $30–$60 and directly addresses the primary cause of steel tank floor failure.
Water-dispersant additives serve a complementary function, helping to suspend water molecules so they pass through the fuel system rather than settling at the tank bottom. Using both in combination is considered best practice in 2026.
Keeping Your Tank Adequately Filled
Here’s a counterintuitive insight that many homeowners miss: a near-empty tank is more vulnerable than a full one. When there’s significant empty space above the fuel line, temperature fluctuations cause condensation on the interior tank walls. This water then drips into the oil and accumulates at the bottom. Maintaining your tank at a minimum of 25–30% capacity during warmer months, and keeping it as full as practical during winter, reduces condensation significantly.
External Protective Coatings and Enclosures
For outdoor aboveground tanks, applying a rust-inhibiting paint or coating every few years provides meaningful protection against external corrosion. Ensure that the tank’s legs don’t sit directly in pooled water — elevate on gravel or use corrosion-resistant leg pads. Consider an oil tank cover or housing if your outdoor tank is exposed to heavy rainfall or coastal salt air.
Oil Tank Insurance and Secondary Containment
In 2026, a growing number of homeowners are investing in dedicated oil tank insurance policies, which can cover remediation costs for covered leak events. Additionally, placing your indoor tank inside a secondary containment unit — essentially a large tray or bunded platform that can hold 110% of the tank’s capacity — is now a best-practice recommendation in most jurisdictions and a legal requirement in some. These units range from $200 to $600 and can be retrofitted around existing tanks.
Cost Comparison: Maintenance vs. Remediation
The financial argument for proactive tank care is overwhelming. Here’s a side-by-side comparison of typical costs to contextualize what’s at stake.
| Item | Estimated Cost (2026) | Frequency | Risk Level Addressed |
|---|---|---|---|
| DIY visual inspection | $0 | Twice yearly | External/fitting issues |
| Biocide/water dispersant treatment | $30–$60 | Annually | Internal corrosion/sludge |
| Professional ultrasonic inspection | $150–$350 | Every 3–5 years | Wall thinning/structural integrity |
| Tank replacement (double-wall steel, 275 gal) | $1,500–$3,200 | Every 25–35 years | All risks (proactive) |
| Soil/groundwater remediation (avg. case) | $12,500–$50,000+ | One-time (after failure) | N/A — reactive response |
The math is clear: a decade of diligent maintenance — including professional inspections and eventual planned tank replacement — costs a fraction of a single significant leak event. And that’s before factoring in potential insurance premium increases, property devaluation, or legal liability if your leak affects neighboring properties.
Visual Risk Comparison: What Drives Tank Leak Incidents
Primary Causes of Residential Heating Oil Tank Leaks (2025 Industry Data)
2026 Regulatory Landscape: What Homeowners Must Know
Regulations governing residential heating oil tanks have become meaningfully stricter over the past three years, and 2026 has brought several notable developments that homeowners in affected regions need to understand.
In the United States, the EPA’s continued enforcement of the Spill Prevention, Control, and Countermeasure (SPCC) rule — while primarily targeting commercial facilities — has influenced state-level residential regulations. New York State’s updated Petroleum Bulk Storage regulations, which took effect in early 2026, now require homeowners with tanks over 400 gallons to register their tanks with the state Department of Environmental Conservation and maintain documented inspection records. Massachusetts and New Jersey have similar registration programs already in effect.
In the United Kingdom, OFTEC standards updated in 2025 recommend that all domestic oil tanks undergo a formal condition assessment every five years, with non-compliant tanks potentially affecting home insurance validity. Many UK insurers now explicitly include tank inspection records as a condition of coverage under heating-related policy clauses.
In Canada, provincial requirements vary significantly. Ontario’s Technical Standards and Safety Authority (TSSA) mandates that all fuel oil equipment — including storage tanks — be installed and serviced by registered contractors, with required periodic inspections for tanks over 10 years old in several provinces.
Practical guidance: Check with your local municipality and state or provincial environmental agency to understand your specific obligations. The cost of non-compliance — fines, loss of insurance coverage, mandatory remediation — far exceeds the cost of staying current with inspections and documentation.
Frequently Asked Questions
How often should a residential heating oil tank be professionally inspected?
For most residential aboveground steel tanks, a professional inspection using ultrasonic testing is recommended every three to five years for tanks under 15 years old, and every one to two years for tanks over 20 years old. In addition to these scheduled professional visits, homeowners should perform their own visual inspection at least twice annually — before the heating season begins and midway through winter. Tanks showing any signs of corrosion, previous repairs, or located in high-humidity environments warrant more frequent professional attention. Always document your inspections with dates and photos.
What are the early warning signs that my heating oil tank may be failing?
Early warning signs include: a persistent petroleum smell in your home that you can’t attribute to a specific burner issue; small oil stains or discoloration on the floor beneath your tank or fittings; a sight gauge that appears cloudy, discolored, or shows inconsistent readings; unexplained increases in fuel consumption that don’t correlate with temperature or usage changes; and visible rust patches on the exterior, particularly at the tank base, seams, or leg contact points. Any single one of these signs is sufficient reason to call a certified tank professional — multiple signs together indicate the situation may already be urgent.
Is it worth repairing an old heating oil tank, or should I just replace it?
In most cases involving a steel tank over 20 years old, replacement is the more economical long-term choice compared to repair. Repairs to a corroded tank — particularly for internal floor pitting or seam failures — are often temporary fixes that don’t address the underlying degradation throughout the tank. The cost of replacing a standard 275-gallon aboveground steel tank with a modern double-wall unit typically ranges from $1,500 to $3,200 installed in 2026, which is frequently comparable to the cost of a significant repair, while delivering a fresh 25-to-35-year lifespan and substantially lower leak risk. For newer tanks (under 15 years) with localized fitting or supply-line issues, targeted repair is usually the right call. Always get a professional assessment before deciding.
Your Tank Protection Roadmap: Next Steps
Protecting your heating oil tank isn’t a one-time event — it’s a systematic practice that pays dividends in safety, financial protection, and peace of mind. Here’s your concrete action plan to implement immediately:
- This week: Conduct a full DIY visual inspection using the checklist above. Document your findings with photos and note your tank’s approximate age if you don’t already know it.
- This month: Add a biocide and water-dispersant treatment to your tank. Source a quality product from your fuel supplier or a reputable hardware retailer and follow the dosing instructions for your tank capacity.
- This season: Schedule a professional ultrasonic inspection if your tank is over 15 years old or has never been professionally assessed. Budget $150–$350 and treat it as essential home maintenance — not an optional expense.
- This year: Investigate your local and state/provincial regulatory requirements for tank registration and inspection documentation. Start or update your inspection logbook.
- Long-term: If your tank is approaching or past 25 years old, start planning and budgeting for replacement with a modern double-wall unit. Don’t wait for a failure to force the decision.
As energy costs remain elevated and environmental regulations tighten through 2026 and beyond, the homeowners who invest in proactive tank management will face dramatically fewer financial surprises than those who wait and react. The broader trend is clear: responsibility for residential fuel storage infrastructure is shifting further onto individual property owners, and the tools and knowledge to meet that responsibility have never been more accessible.
Your heating system works hard for you every winter. The question worth sitting with is this: when did you last work just as hard for it? Schedule that inspection — your future self (and your wallet) will thank you.
Article reviewed by Hans Müller, Industrial Architecture & Concrete Restoration Specialist, on May 4, 2026