
Spring HVAC Startup Procedure: How to Prepare Your AC for Summer
Reading time: 14 minutes
Every spring, millions of homeowners flip on their air conditioners for the first time in months — and discover a very expensive problem. A clogged coil here, a refrigerant leak there, a capacitor that quietly failed during the winter. The result? Emergency service calls that average $350–$600 in 2026, soaring electric bills, and the kind of sweaty misery that no one needs in July.
Here’s the straight talk: your AC doesn’t just turn on — it needs to be prepared. A proper spring startup procedure is the difference between a cool, efficient summer and a breakdown during the worst heatwave of the year. And with U.S. average summer temperatures continuing to trend upward — the summer of 2025 ranked as the third hottest on record nationally — your HVAC system is going to work harder than ever in 2026.
Whether you’re a first-time homeowner or someone who’s been through a few HVAC cycles, this guide transforms a potentially overwhelming checklist into a clear, strategic roadmap. Let’s get your system summer-ready.
Table of Contents
- Why Spring Startup Matters More Than Ever
- Before You Begin: Safety and Tools
- Outdoor Unit Inspection and Cleaning
- Indoor Unit: Air Handler and Evaporator Coil
- Thermostat, Controls, and Smart Systems
- Refrigerant Levels and Electrical Components
- The First-Run Performance Test
- 3 Common Spring Startup Challenges (and How to Solve Them)
- DIY vs. Professional Service: Making the Right Call
- Startup Checklist Comparison: DIY vs. Pro Tasks
- Frequently Asked Questions
- Your Summer-Ready Action Plan
Why Spring Startup Matters More Than Ever in 2026
The HVAC industry has changed significantly over the past few years. In 2026, the full transition to A2L refrigerants — including R-32 and R-454B — as mandated by the EPA’s updated AIM Act regulations has reshaped how technicians service systems. Many older R-410A units are still in service, but homeowners need to be aware that refrigerant costs and handling requirements have shifted. Additionally, energy rates in most U.S. markets climbed an average of 7.2% year-over-year from 2024 to 2025, making efficiency more financially critical than ever.
A well-executed spring startup delivers measurable benefits:
- Energy savings of 15–25% compared to a neglected system (U.S. Department of Energy, 2025 data)
- Extended equipment lifespan — systems that receive annual maintenance average 15–20 years vs. 10–12 years without it
- Better indoor air quality, which matters especially as wildfire smoke events become more frequent across the western and central U.S.
- Reduced risk of mid-summer emergency breakdowns, which typically cost 2–4x more than scheduled maintenance
Think of it this way: a $150–$200 annual maintenance visit or a thorough DIY session is essentially insurance against a $1,500 compressor replacement. The math is not complicated.
Before You Begin: Safety First and Tools You’ll Need
Before touching anything, let’s establish one non-negotiable rule: always shut off power to the system before performing any hands-on work. This means both the thermostat and the disconnect box near the outdoor unit. HVAC capacitors can hold a lethal electrical charge even hours after the power is cut — this is not a system to treat casually.
Essential Tools for a DIY Spring Startup
- Screwdrivers (flathead and Phillips)
- Fin comb (for straightening bent condenser fins)
- Garden hose with adjustable nozzle
- Coil cleaner spray (non-acid formula for residential use)
- Replacement air filters (sized correctly for your system)
- Shop vacuum with brush attachment
- Flashlight or headlamp
- Non-contact voltage tester
- Measuring tape
- Wet/dry thermometer (for supply/return temperature differential testing)
Pro Tip: Before you buy a generic coil cleaner, verify it’s compatible with aluminum fins, which are standard in most modern residential condensers. Acid-based cleaners will degrade aluminum over time and void some manufacturer warranties.
Outdoor Unit Inspection and Cleaning
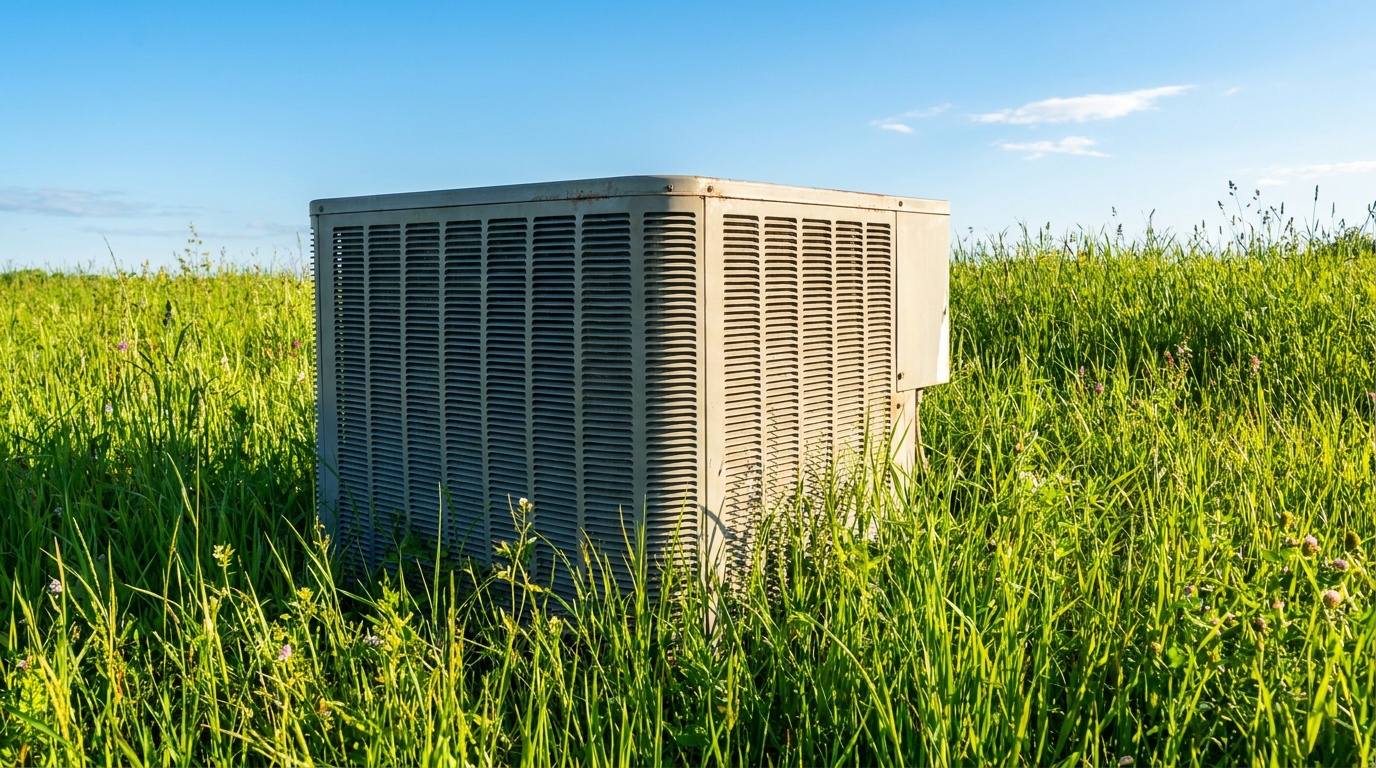
The outdoor condenser unit spent the winter exposed to falling leaves, animal nesting, ice, and debris accumulation. It needs a thorough assessment before it runs.
Step-by-Step Condenser Cleaning Process
Step 1: Remove the cover (if applicable)
Many homeowners cover their condensers for winter. If you used a breathable mesh cover, you may find minimal debris. If you used a solid cover — or no cover at all — expect more work. Remove the cover and visually inspect the unit before touching anything.
Step 2: Clear the surrounding area
HVAC professionals recommend maintaining at least 18–24 inches of clearance on all sides of the condenser and 5 feet of clearance above for proper airflow. Trim back any shrubs, remove any mulch buildup against the base, and clear away winter debris.
Step 3: Remove the top grille and clean the fan
With power fully disconnected, unscrew the top grille panel. Carefully lift it — the fan motor is usually attached, so don’t yank it. Wipe the fan blades with a damp cloth, removing any debris that could cause vibration or imbalance. Inspect the fan blade edges for cracks or chips.
Step 4: Clean the condenser coils
Apply coil cleaner to the fins per product instructions (typically a 5–10 minute dwell time). Then rinse from the inside out with your garden hose — this pushes debris outward rather than packing it further in. Use gentle pressure; high-pressure washing will bend the delicate aluminum fins.
Step 5: Straighten bent fins
Even minor bending of the condenser fins reduces airflow and efficiency. Run a fin comb (sized to your unit’s fin density, usually 12–18 fins per inch) along any bent sections. This small step can recover meaningful efficiency gains.
Step 6: Inspect the refrigerant lines
Look at the two copper lines running from the condenser into your home. The larger line (suction line) should have insulation in good condition — no cracking, gaps, or missing sections. Damaged insulation leads to energy loss and condensation problems. Foam pipe insulation from any hardware store is an easy fix.
Step 7: Check the condensate drain pan
If your outdoor unit has a base pan, clear any standing water or debris. Stagnant water breeds algae and can corrode the unit base over time.
Indoor Unit: Air Handler and Evaporator Coil
The indoor air handler — whether a furnace with an AC coil, a dedicated air handler, or a heat pump air handler — is where the other half of your system lives. This is also where the most impactful efficiency and air quality gains come from.
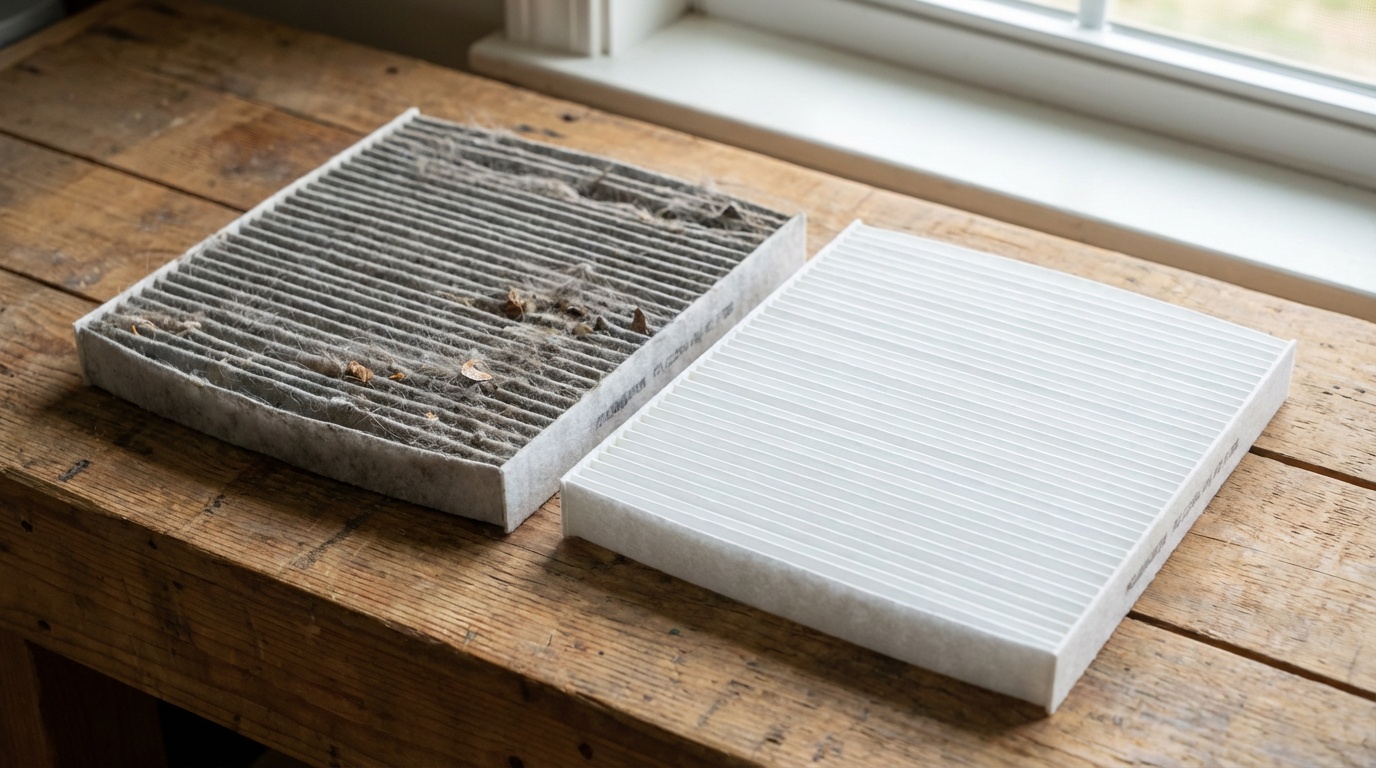
Air Filter Replacement: The Single Most Important Step
If you do nothing else from this entire guide, change your air filter. A dirty filter is the leading cause of AC inefficiency, evaporator coil freeze-ups, and reduced airflow. According to ENERGY STAR data, a clogged filter forces the blower motor to work 10–15% harder, directly translating to higher electricity consumption.
In 2026, filter selection has become more sophisticated. Here’s what to know:
- MERV 8–11: Best for most residential systems. Captures dust, pollen, mold spores, and pet dander without significantly restricting airflow.
- MERV 13+: Hospital-grade filtration. Excellent air quality, but requires a system designed for higher static pressure. Check your HVAC equipment manual before upgrading.
- HEPA-adjacent filters: Many 2025–2026 smart filter systems now include air quality monitoring that alerts you via smartphone app when replacement is needed.
Case Study — The Rodriguez Family, Phoenix, AZ (2025): After experiencing two consecutive summers of poor cooling performance and high bills, the Rodriguez family had their system inspected. The technician discovered a MERV-16 filter had been installed in a standard residential air handler — the system was essentially suffocating. Swapping to a MERV-10 filter reduced their monthly cooling bill by $47 and resolved the uneven cooling complaints throughout the home.
Evaporator Coil Inspection
The evaporator coil sits above or below your air handler and is responsible for actually absorbing heat from your home’s air. Over a winter of inactivity, it can accumulate dust, mold growth, or even develop minor refrigerant leaks that went unnoticed.
Access panels vary by system — consult your manual if you’re unsure how to access the coil. Once visible, look for:
- Dust buildup: A light coating is normal; thick accumulation requires coil cleaner (no-rinse evaporator coil spray is ideal for indoor coils)
- Ice formation or frost residue: Indicates a refrigerant issue or airflow restriction — call a professional
- Visible mold or dark streaking: Address with an EPA-registered coil cleaner and consider UV light installation to prevent recurrence
- Oil stains near coil joints: A potential indicator of refrigerant leaks — flag for professional inspection
Condensate Drain Line Cleaning
This step is ignored by a surprising number of homeowners — until a clogged drain causes water to back up, overflow the drain pan, and damage ceilings or flooring. It’s a $5 problem that becomes a $500 problem fast.
Locate your condensate drain line (typically a PVC pipe near the air handler). Pour a cup of distilled white vinegar into the access port (or use a condensate drain cleaning tab). Follow with a cup of water. This kills algae and bacteria buildup that causes clogs. For a drain that’s already restricted, a wet/dry vacuum applied to the exterior drain outlet will often clear the blockage in under a minute.
Thermostat, Controls, and Smart Systems
Spring startup is the perfect moment to evaluate your thermostat setup. In 2026, smart thermostats have reached near-universal availability — Nest, Ecobee, Honeywell Home, and dozens of competitors now offer models under $150 that pay for themselves within one cooling season through intelligent scheduling and occupancy sensing.
For your startup procedure, address the following:
- Replace thermostat batteries (non-smart models) — a simple step often overlooked
- Update firmware on smart thermostats — several 2025 updates improved compressor protection algorithms
- Set summer programming schedules — pre-cool your home 30–60 minutes before peak occupancy rather than cooling during peak rate hours
- Test emergency heat / auxiliary heat lockout settings on heat pump systems
- Verify temperature calibration — hold a calibrated thermometer near the thermostat sensor and compare readings
Quick Scenario: Imagine your thermostat is reading 2°F warmer than actual room temperature. Your system runs longer than necessary every single cycle. Over a full cooling season (May–September), that miscalibration could add $60–$120 to your energy bill. A 60-second calibration check prevents that waste entirely.
Refrigerant Levels and Electrical Components
Let’s be direct: refrigerant handling is not a DIY task. EPA Section 608 regulations require certification for purchasing and handling refrigerants, and in 2026 the regulatory landscape around A2L refrigerants has added additional safety requirements. However, you can identify warning signs that warrant a professional call.
Signs of low refrigerant:
- Ice forming on the refrigerant lines or evaporator coil
- Hissing or bubbling sounds near the outdoor unit
- Warm air blowing from supply vents when the system is set to cool
- Higher-than-normal electric bills with reduced cooling performance
- Visible oil staining near pipe connections
Electrical component checks you can safely perform (with power OFF):
- Inspect all visible wiring for fraying, rodent damage, or melted insulation
- Check that the disconnect box fuses/breakers are intact and correctly rated
- Look inside the electrical panel of the outdoor unit for corrosion on terminals
- Verify the capacitor (cylindrical component) isn’t visibly bulging or leaking — this indicates failure and requires professional replacement
Case Study — The Thornton Residence, Nashville, TN (Spring 2025): During their annual DIY startup, the homeowners noticed a visibly swollen run capacitor on their 8-year-old condenser. Rather than attempting to replace it themselves, they scheduled a service call. The technician replaced the capacitor ($85 part), discovered a failing contactor in the same visit, and replaced both. Total cost: $185. Three weeks later, their neighbor with an identical system — who skipped the spring inspection — had a compressor failure linked to a burnt-out capacitor that caused motor stress. Compressor replacement: $1,400.
The First-Run Performance Test
You’ve cleaned, inspected, and prepared everything. Now it’s time to actually run the system — strategically. Don’t just crank the thermostat and walk away. Conduct a structured performance test.
Step 1: Choose the right day. Run your first startup test on a mild day (outdoor temperature between 60–75°F). Avoid starting a system that’s been dormant on a 95°F afternoon — the compressor operates under greater stress and you’ll have less diagnostic clarity.
Step 2: Set the thermostat 5°F below current room temperature and allow the system to run for at least 15 minutes to stabilize.
Step 3: Measure the temperature differential. Using a thermometer, measure the temperature of air going into your return vent and air coming out of a supply vent near the air handler. A healthy split-system AC should show a temperature differential of 15–20°F. Less than 15°F suggests a problem (dirty coil, low refrigerant, restricted airflow). More than 20°F can indicate poor airflow across the coil.
Step 4: Listen for irregularities. During the first 5 minutes of operation, note any unusual sounds — rattling (debris or loose panels), grinding (failing bearing), high-pitched squealing (belt or bearing), or intermittent cycling (short-cycling indicates a control issue).
Step 5: Check all supply vents. Walk through every room and verify that conditioned air is flowing from all registers. Rooms with significantly weaker airflow may have duct issues or closed dampers.
3 Common Spring Startup Challenges (and How to Solve Them)
Challenge 1: The System Runs But Won’t Cool
This is the most frustrating spring discovery. The system appears to start normally — you hear the outdoor unit running, the indoor fan blows — but room temperatures don’t drop. The most common culprits in order of likelihood: (1) dirty evaporator coil restricting heat transfer, (2) low refrigerant charge, (3) failed reversing valve on heat pumps stuck in heating mode, or (4) a grossly clogged air filter. Start by checking the filter, then assess coil cleanliness. If both look fine, call a professional for refrigerant testing — don’t let the system run indefinitely trying to cool without success, as this stresses the compressor.
Challenge 2: Water Leaking from the Indoor Unit
Finding a puddle under your air handler in spring is alarming but usually solvable. The most common cause is a clogged condensate drain line (addressed earlier in this guide). The second cause is a frozen evaporator coil that thawed and overwhelmed the drain pan. A frozen coil results from restricted airflow (dirty filter or blocked return) or low refrigerant. If you’ve cleared the drain and replaced the filter and leaking persists, the drain pan itself may be cracked — a replacement pan costs $30–$80 and is a straightforward DIY fix on most systems.
Challenge 3: Unusual Noises on Startup
A brief startup clunk or click is completely normal as refrigerant pressure equalizes and contactors engage. Concerning noises include: a loud banging or clanking (something loose inside the unit — shut it off immediately), a constant rattling (debris in the outdoor unit — inspect the fan area), or a persistent humming with no fan or compressor movement (likely a failed capacitor). The latter is one of the most common spring startup failures — capacitors are stressed by winter temperature extremes and frequently fail right at the beginning of the cooling season.
DIY vs. Professional Service: Making the Right Call
Not everything in this guide requires a technician, but some tasks absolutely do. Here’s an honest breakdown of where the line falls:
DIY-appropriate tasks: Filter replacement, condenser coil rinsing, fin straightening, condensate drain cleaning, thermostat battery/firmware updates, debris clearing, visual electrical inspection, performance testing with a thermometer.
Professional-only tasks: Refrigerant testing and recharging, capacitor replacement (high-voltage risk), contactor and relay testing, duct leakage testing, refrigerant leak detection, motor current draw testing, and any work on A2L refrigerant systems (which include most systems installed 2025 onward).
In 2026, the average cost of a professional spring tune-up is $89–$175 for a standard residential system, though many HVAC companies offer discounted spring specials in March and April before peak demand season. Many homeowners find the best value in a hybrid approach: complete all DIY tasks themselves, then schedule a professional for the electrical and refrigerant checks. This optimizes both cost and thoroughness.
Startup Checklist: DIY vs. Professional Task Comparison
| Task | DIY Friendly? | Difficulty Level | Avg. DIY Cost | Avg. Pro Cost |
|---|---|---|---|---|
| Air Filter Replacement | ✅ Yes | Beginner | $15–$40 | $25–$60 |
| Condenser Coil Cleaning | ✅ Yes | Intermediate | $10–$30 | $75–$150 |
| Condensate Drain Flush | ✅ Yes | Beginner | $2–$8 | $50–$100 |
| Refrigerant Level Check | ❌ No | Pro Only | N/A | $80–$150 |
| Capacitor / Contactor Testing | ❌ No | Pro Only | N/A | $85–$200 |
Efficiency Impact of Spring Startup Tasks
The chart below shows the estimated efficiency gain from each completed startup task, based on ENERGY STAR and ACCA (Air Conditioning Contractors of America) 2025 research data:
Frequently Asked Questions
How early in spring should I start my AC startup procedure?
Aim to complete your spring startup procedure at least 4–6 weeks before you expect to use your AC regularly — in most U.S. climate zones, that means completing it in March or early April. This timing accomplishes two things: it gives you diagnostic runway to schedule professional repairs without emergency pricing, and it allows HVAC companies time to order parts that may be on backorder. In 2026, supply chain improvements have eased some component shortages compared to 2022–2024, but popular parts like ECM motors and specific capacitor kits can still take 1–2 weeks to arrive in some regions.
Can I run my AC to test it when outdoor temperatures are still cold?
Most manufacturers recommend not running your central AC compressor when outdoor temperatures are below 60°F. Cold temperatures affect refrigerant pressure and oil viscosity in the compressor, and running the system below this threshold can cause compressor damage or oil slugging. If you need to test the system before temperatures warm sufficiently, you can run the air handler in “fan only” mode to verify blower operation, check that the thermostat is functioning, and confirm that conditioned air distributes properly through the ductwork — all without engaging the compressor.
How often should I have my AC professionally serviced beyond the spring startup?
For most residential systems, once annually in spring is the standard recommendation — and it’s sufficient for systems under 8–10 years old in good condition. However, if you have a heat pump (which runs year-round for both heating and cooling), a bi-annual service schedule — spring and fall — is advisable. Systems over 12 years old benefit from more frequent professional checks, as component wear accelerates. Additionally, if you notice mid-season performance changes such as rising bills, reduced cooling, or new sounds, don’t wait for the next scheduled visit. The cost of early diagnosis is almost always far less than the cost of a failure left unaddressed.
Your Summer-Ready Action Plan: Next Steps That Actually Matter
You now have a complete framework. The question is: what do you do with it this weekend? Here’s your practical roadmap, organized by urgency and impact:
- This week (immediate): Check and replace your air filter, clear debris from around the outdoor unit, and flush your condensate drain line. These three tasks alone cover the majority of DIY efficiency gains and take under 90 minutes total.
- This weekend: Clean the condenser coils with appropriate spray, inspect refrigerant line insulation, check the fan blades and straighten any bent fins. Update your thermostat firmware and program your summer schedule.
- Schedule within the next 2–3 weeks: Book a professional spring tune-up if your system is over 8 years old, if you haven’t had it serviced in over a year, or if your spring startup performance test shows a temperature differential outside the 15–20°F range.
- Before peak season (by June 1): Confirm your HVAC service contract or warranty status. Know the model numbers of your indoor and outdoor equipment — take a photo and save it in your phone. If your system is approaching 12+ years of age, request that your technician provide a replacement cost estimate so you’re not making a major financial decision under duress during a heatwave.
- Ongoing this summer: Check filters monthly during peak cooling months. Keep a simple log of your monthly electric bills to detect efficiency changes early.
As climate patterns continue shifting and energy costs remain elevated through 2026 and into 2027, HVAC efficiency is no longer just a comfort issue — it’s a financial one. Homeowners who treat their cooling systems as managed assets, rather than appliances that just run, consistently save hundreds of dollars annually and avoid the stress of mid-summer failures.
Here’s the question worth sitting with: Is your AC system prepared to perform efficiently through what forecasters are projecting to be another above-average summer in 2026 — or are you hoping for the best and paying for the difference in your electricity bill? The answer to that question is entirely within your control, and the time to act is right now.
Ready to get started? Bookmark this guide, gather your tools, and dedicate one Saturday morning to your spring HVAC startup. Your future self — comfortable, cool, and not staring down a $1,500 repair bill in August — will thank you for it.
Article reviewed by Hans Müller, Industrial Architecture & Concrete Restoration Specialist, on May 4, 2026